
Managing a server can be a daunting task, especially for those who are not well-versed in command-line interfaces. Fortunately, control panels like aaPanel simplify this process significantly. This article provides a comprehensive guide on how to install aaPanel on Ubuntu 24.04 LTS, ensuring you have a powerful yet user-friendly interface for managing your web hosting environment.
What about the here and now?
There are plenty of alternative routes to take. One such route is aaPanel, which is a free, open source tool that has been deployed to over 3 million servers worldwide. aaPanel allows admins to manage the likes of:
- Websites
- Databases
- FTP
- Docker containers
- Python projects
- Cron
- Server security
- Google Cloud and AWS integration
- Mail server
- Plugin system to extend features
Although aaPanel might not be an exact drop-in replacement for cPanel, it is certainly a worthy contender as an interim tool.
Let’s get it installed and see what it has to offer.
What you’ll need
aaPanel can be installed on CentOS or Ubuntu Server. I’m going to deploy the platform on Ubuntu Server, but the installation process should work on most CentOS forks, such as AlmaLinux. You’ll also need a user with sudo privileges.
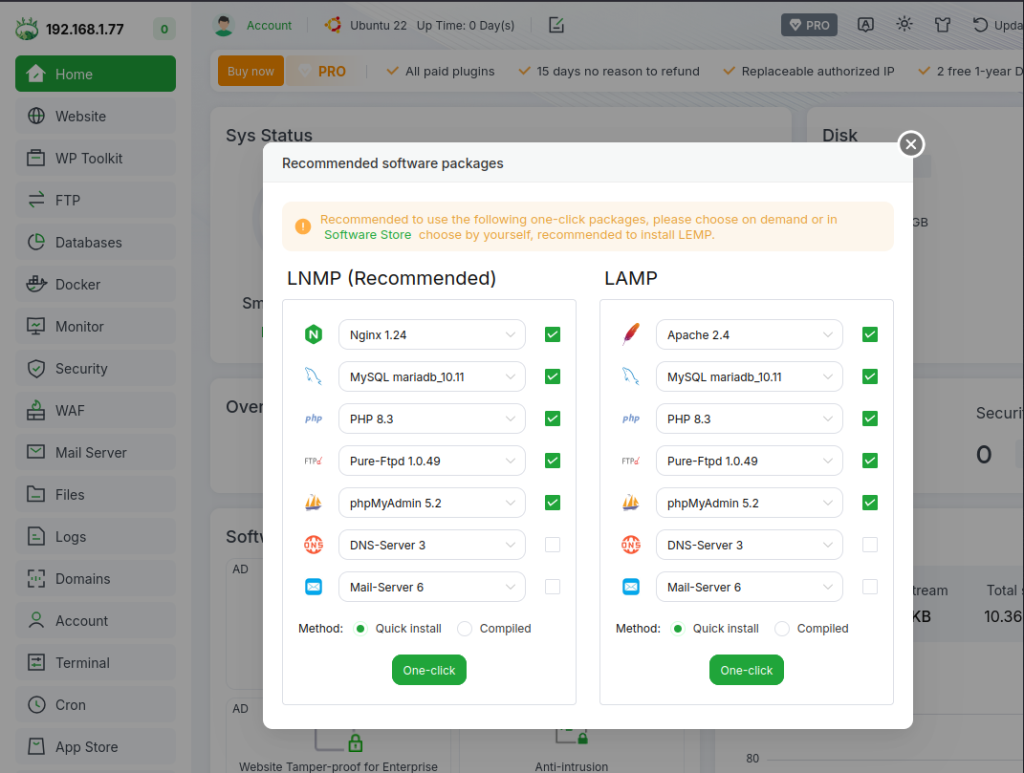
How to install aaPanel
Installing aaPanel is quite easy. In fact, the process is the same, regardless if you’re using Ubuntu or a CentOS fork. To install aaPanel, log in to your server and issue the command:
Download the Installation Script
The next step is to download the aaPanel installation script. Use the following command:
URL=https://www.aapanel.com/script/install_7.0_en.sh && if [ -f /usr/bin/curl ];then curl -ksSO "$URL" ;else wget --no-check-certificate -O install_7.0_en.sh "$URL";fi;bash install_7.0_en.sh aapanelThis command fetches the installation script from the official aaPanel website and executes it with root privileges. The script will automatically configure your server for aaPanel installation.
Confirm Installation Settings
During the installation process, you will be prompted to confirm various settings. Pay attention to these options:
- Installation Directory: The default directory is usually fine, but you can customize it if needed.
- SSL Options: You can choose to enable SSL during installation for secure connections.
This step ensures that your server is set up according to your preferences.
Accessing the aaPanel Web Interface
Once the installation completes successfully, you can access the aaPanel web interface through your web browser. Open a browser and navigate to:
http://<your-server-ip>:7800You will see a login page where you can enter the default credentials provided at the end of the installation process. Typically, this includes an admin username and password generated by the script.
Troubleshooting Common Issues
If you encounter issues during or after installation, here are some common problems and solutions:
- Error: “Failed to download script”:
– Ensure that your internet connection is stable.
– Check if there are any firewall rules blocking outgoing connections. - Error: “Port already in use”:
– Another service may be using port 7800. Check running services using:
sudo netstat -tuln | grep :7800– If necessary, change the port in the configuration file.
- Error: “Cannot connect to database”:
– Verify database credentials entered during setup.
– Ensure that MySQL/MariaDB service is running:
sudo systemctl status mysql
- Error: “Permission denied”:
– Ensure you are executing commands with root privileges or using sudo where necessary.
Uninstallation Process
If you decide that aaPanel is not suitable for your needs or wish to remove it entirely from your server, follow these steps carefully:
sudo bt stop && sudo update-rc.d -f bt remove && sudo rm -f /etc/init.d/bt && sudo rm -rf /www/server/panel
This command stops all running processes related to aaPanel and removes its files from your system safely.

